¶ How to Install Minecraft Modpacks on Your Server
Installing modpacks on your EVLBOX Minecraft server is a simple and straightforward process. Follow the steps below to enhance your Minecraft experience by customizing your server with the modpacks of your choice.
¶ Step-by-Step Guide to Install Modpacks
-
Log in to the Nitro Panel:
- Start by logging into the EVLBOX Nitro Panel with your account credentials.
- Once logged in, click on Manage Server to access your server settings.
-
Create a Backup (Optional but Recommended):
- Before making any changes, it’s highly recommended to back up your server data to prevent potential data loss.
- For detailed instructions on how to create a backup, refer to our Backup Guide.
-
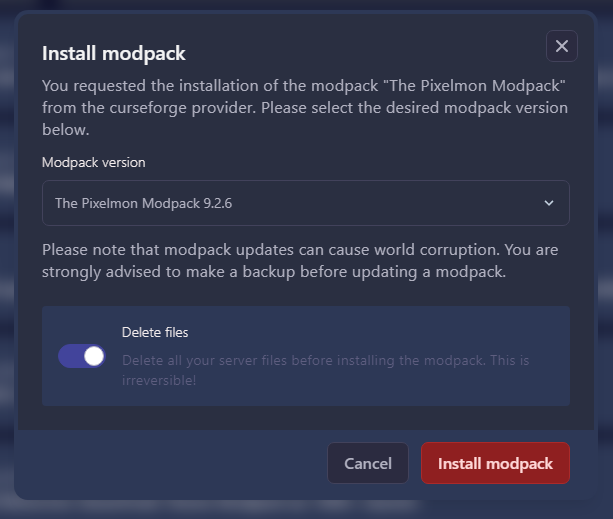
Navigate to the Modpack Tab:
- In the Nitro Panel, click on the Modpack tab.
- Select the modpack provider and modpack version that you would like to install from the list of available options.

-
Choose the Modpack Version:
- Click on the download icon next to your desired modpack.
- You will be prompted to choose the version of the modpack you want to install.
- Important: We recommend deleting all existing files before proceeding with the installation to avoid potential conflicts.
-
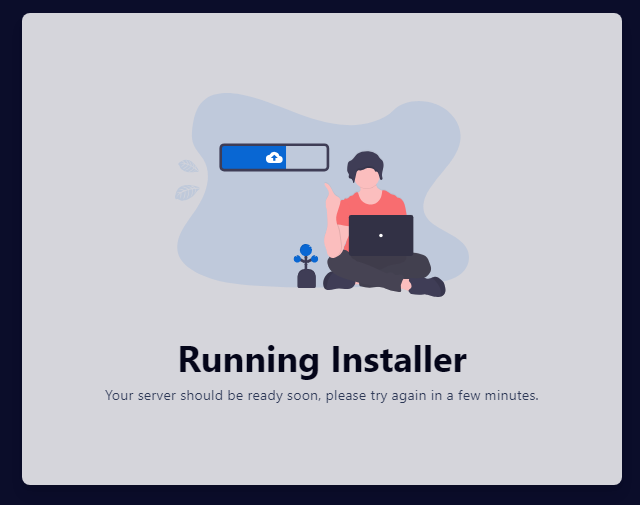
Installation Progress:
- After selecting the modpack version, click Install to begin the installation process.
- A pop-up window will appear showing the installation progress. The window will automatically close once the download and installation are complete.
-
Start Your Server:
- Once the installation is complete, go back to the Dashboard and click Start Server to launch your modded Minecraft server with the new modpack installed.
¶ Why Install Modpacks?
Modpacks allow you to significantly enhance your Minecraft server by adding new gameplay features, mechanics, and customization options. Whether you want to improve the performance, add new items, or change the entire playstyle, modpacks give you the flexibility to do so.
Ready to Create Your Own Modded Minecraft Server?
Visit EVLBOX Minecraft Servers to get your own high-performance Minecraft server today and start customizing it with mods and modpacks!